
Wheat Penny Errors: Mint Marks, Doubled Dies, and Wear Clues
A photo-first guide to wheat penny errors: spot reliable mint marks, doubled dies, and wear clues, and learn the verification steps to follow.
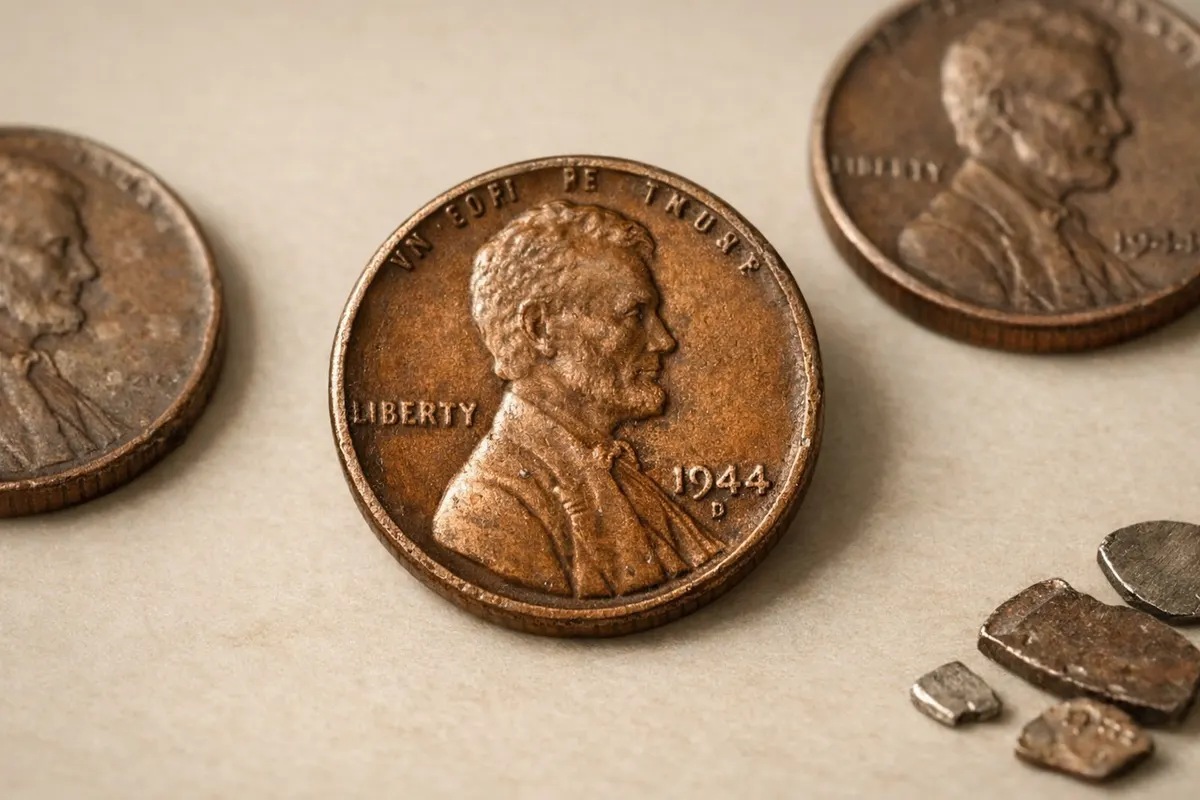
Quick answer: what photos can show about wheat penny errors
Photos can reliably show several classes of wheat penny errors at a glance: clear mint marks (D, S, none), bold doubling confined to raised design elements consistent with doubled dies, and damage patterns that align with post-strike events like rim nicks or scratches. When the image is high quality and properly lit, you can exclude some possibilities—damaged lettering looks different from die doubling, and a crisp doubled die will repeat the entire stroke, not just a single nick or scratch.
However, a single photo rarely proves final authenticity or market value. Color and surface tone can hint at composition (for example, the unusual look of a 1943 copper cent) but are weak proof without weight, magnetism, or provenance. Likewise, faint doubling, subtle repunched mint marks, and tiny die chips need multiple angles and higher magnification to distinguish from photographic artifacts, corrosion, or post-strike damage.
Use the following checklist as a practical first-pass filter: verify mint marks and date legibility, look for consistent repeating forms across letters and numbers (a sign of a doubled die), inspect rims and fields for die chips or cracks, and note areas of wear that could hide or mimic error traits. Treat photographic IDs as research notes that direct what to test next—measurements, non-destructive tests, or an expert sighting—rather than definitive certificates.
- Photos reliably show mint marks, bold doubled dies, die cracks, and rim chips when well-lit and in focus.
- Color or surface tone alone are weak signals; they suggest lines of inquiry but not proof.
- Faint doubling and single-line anomalies often need multi-angle or magnified photos to confirm.
- Treat photo-based IDs as first passes, not final verification or value proof.
Strongest visual clues on wheat penny errors
Start with design features that consistently survive photos: date and mint mark shapes, repeatable doubling across letters or numerals, and die break patterns. A true doubled die shows the same secondary image across multiple raised elements—look for duplicated serifs, repeated strokes on both letters and adjacent numerals, or clear ghost lines that mirror the primary design at the same orientation. The 1955 doubled die obverse is a classic example where entire letters and date digits show consistent second images; when you see matching repetition across characters, that’s a strong visual signal.
Mint marks (D for Denver, S for San Francisco, or no mint mark for Philadelphia on many wheat cents) are another stable clue. A repunched mint mark (RPM) or doubled mint mark can be visible as offset letters in the mint mark area; when the doubling is confined to the mint mark and the rest of the design is normal, consider RPM or punch-related issues rather than an overall doubled die. Photograph the mint mark up close at 2–3x magnification to evaluate whether the second impression shares the same strike characteristics.
Die chips, die cracks, and die breaks leave repeatable raised burrs or linear ridges in the same spot across strikes from the same die. These are often easy to spot as localized fillings or tiny raised nodes on fields and rims. Unlike corrosion, which looks pitted or irregular, die chips appear as sharp, rounded protrusions that match the struck metal’s flow. Look at the reverse wheat stalks near the rim: consistent raised nodules or a thin raised line across multiple coins from the same year/mint commonly indicate a die flaw rather than post-strike damage.
Orientation and alignment clues help too. Doubling from mechanical die rotation or hub doubling has a predictable direction—compare the offset direction across letters and digits. Also note how wear interacts with the anomaly: a true doubled die will show both impressions wearing down together over time, while a scratch or dent will cut through the surface and not produce matching worn forms across multiple characters.
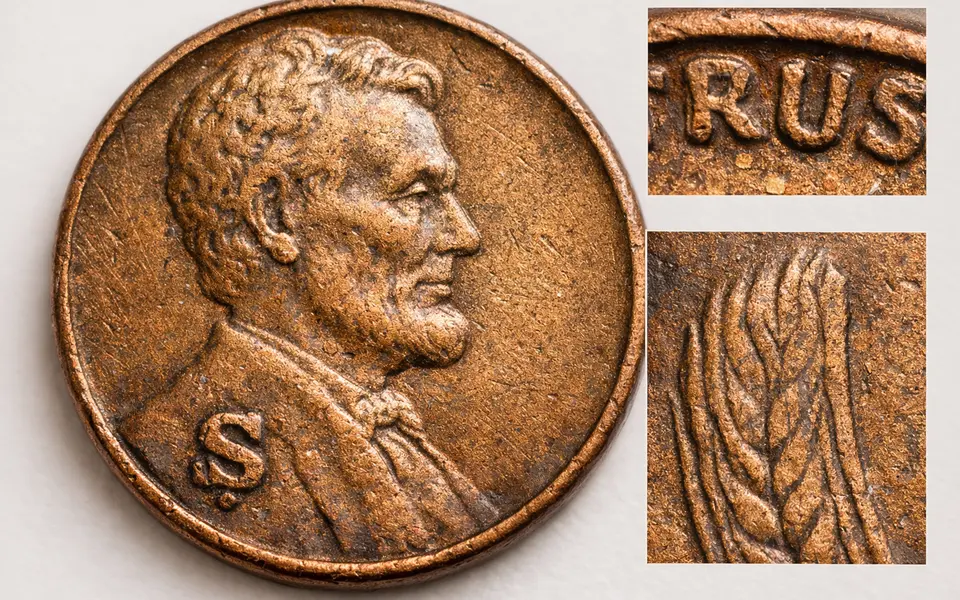
- Repeated doubling across multiple letters/numbers = strong doubled die indicator.
- Repunched mint marks look like offset characters only in the mint mark area; check magnified close-ups.
- Die chips/cracks appear as raised, repeatable burrs, not pitted corrosion.
- Consistent orientation of a second image across elements supports a struck error, not post-strike damage.
- Examine how wear affects the anomaly—both impressions wearing together favors a struck error.
Weak signals that commonly mislead wheat penny identifications
Some clues look convincing in a single snapshot but are unreliable on their own. Color and patina are classic culprits: brown, red, or orange surfaces can mislead you into thinking a composition anomaly exists (for example, assuming a 1943 penny is copper). Lighting, white balance, and camera sensor limitations change color drastically. A slightly reddish tone does not prove copper content; weight and magnetism tests are needed to confirm metal composition, and professional verification is required for any rare composition claim.
Glare, reflections, and shallow depth of field create false doubling or ghost lines in photos. A specular highlight that skirts a raised edge can mimic doubling if the camera captures two slightly offset highlights. Similarly, motion blur or out-of-focus edges often look like faint second strikes. Always re-shoot at steady lighting with the coin flush on a neutral surface and include a scale or reference object to ensure consistent focus and distance.
Wear patterns—especially on high points like Lincoln’s cheek and jaw or the wheat stalk tips—can erase or deform dies and make a normal coin look anomalous. A worn-overdate or a struck-in filled date from circulation should not be confused with a die variety. Also beware of cleaning marks, file lines, and environmental pitting; these post-strike alterations can imitate die cracks or repunched features but lack the crisp, repeatable geometry of struck die flaws.
Obverse/reverse mirroring mistakes are another source of error: images of two different coins placed side-by-side can look like a doubled die if not labeled or aligned. Always verify that multiple photos you compare are of the same coin and include at least one shot showing the coin’s edge or a unique scratch to confirm identity across frames.
- Color/patina alone cannot prove composition or rare alloy claims.
- Glare, blur, and reflections often mimic doubling—re-shoot under diffuse light.
- Wear, cleaning, and environmental damage can resemble die flaws but lack repeatable form.
- Ensure photos compared are of the same coin; use a unique marker or edge shot when possible.
Step-by-step comparison workflow for wheat penny errors
A structured comparison workflow prevents rush-to-conclusion errors. Start by collecting a consistent photo set: a sharp obverse, a sharp reverse, a close-up of the date and mint mark, a rim/edge shot, and one angled oblique to reveal depth. Use diffuse natural daylight or a lightbox to reduce specular highlights. A phone macro lens or a simple clip-on magnifier helps reveal fine doubling or repunching without specialized equipment.
Next, isolate the anomaly. Zoom to the area and mentally separate what you see into three buckets: repeated geometry (suggests struck die issue), raised irregular burrs (die chips/cracks), or linear scratches and pits (post-strike damage). Compare the suspected anomaly across all available images. A real doubled die will repeat the same offset form on multiple characters and at consistent angles; post-strike damage will usually be localized and inconsistent.
Use reference images and variety registries once you’ve narrowed the class of error. Look for documented examples of the same year and mint—many classic doubled dies and RPMs have published photos where you can match the exact shape of a doubled serif or date digit. When you find a candidate match, compare specific micro-features: the shape of the numeral loops, the position of die chips relative to the rim, and any unique ridge patterns on fields. Document every match as part of your research notes: date, mint, suspected variety, and similarities.
When the photo evidence is ambiguous, add non-visual checks before elevating the claim. Simple tests such as weight and magnetism (to rule out steel 1943 cents) are quick and non-destructive; a magnet check can immediately discard some composition hypotheses. If weight and magnet tests are feasible, record the results alongside photos. If uncertainty remains, treat the identification as provisional and seek a second opinion from a trusted catalog reference or an experienced grader rather than asserting a final classification publicly.
- Collect a consistent photo set: obverse, reverse, date/mint close-up, rim/edge, and oblique angle.
- Classify the anomaly as repeated geometry, raised burr, or post-strike damage.
- Match micro-features—serifs, digit shapes, and die chip locations—against documented examples.
- Run non-visual tests when possible (weight, magnetism) before treating a composition claim as likely.
- Label any provisional IDs in your notes and seek a specialist opinion if value or rarity is at stake.
App workflow
After you run the visual checklist, use Coin Identifier - Coinora as a focused next step. Treat the app as a first-pass research assistant: open the app, select the coin type (Lincoln Wheat Cent), and enter obvious metadata—year, mint mark (if legible), and any visible error class (for example, doubled die or mint mark repunch). Include notes about photo quality, lighting, and whether you ran any quick non-destructive tests like magnetism. These contextual details improve the app’s filtering and keep your result as a research note, not a formal attribution.
When the app returns likely matches or suggested varieties, use those leads to pull reference photos and published descriptions. If the app suggests a known doubled die or RPM, compare the micro-features you documented—date digit shapes, letter serifs, and die chip positions—against the app’s sample images. If the app result is ambiguous or flags multiple possibilities, prioritize matches with the highest number of shared micro-features rather than ones that match color or overall tone.
Record the app suggestions alongside your photo set and the exact comparison points you used. If the app indicates a rare or high-value variety, pause and verify with additional physical checks or an expert opinion before assuming market value. The app speeds research and narrows options, but it should supplement—not replace—the hands-on checks and provenance steps collectors rely on for confident identification.
- Enter year, mint mark, and visible error type into the app as contextual filters.
- Compare app-suggested matches by micro-features rather than color or tone.
- Log app results, comparison points, and any non-visual test outcomes as part of your research notes.
- Treat app suggestions as leads—confirm rare or valuable claims with expert verification.
Related guides
Use Coin Identifier - Coinora as your research companion
After you complete the photo checklist and note the strongest clues, open Coin Identifier - Coinora to narrow likely wheat penny error matches. Enter the year and visible mint mark, add your close-up photos and notes about doubling, die chips, or wear, and treat the app’s results as targeted leads for further checks. If the suggestion points to a rare variety, preserve your photos and run quick non-destructive tests (magnetism, weight) or seek a specialist confirmation before assuming rarity or value. Coin Identifier - Coinora speeds the compare-and-verify step—use it to organize evidence and prioritize which coins deserve a deeper look.
Take the next step →Frequently asked questions
How can I tell a doubled die on a wheat penny from a scratch or a post-strike mark?
A doubled die repeats the same secondary form across multiple raised elements and shows mirrored, consistent strokes—look for duplicated serifs or entire letter shapes offset in the same direction. Scratches or post-strike marks cut across the surface with inconsistent paths and lack repeatable geometry. Re-shoot the area under diffuse light and at higher magnification; if the doubled features appear on adjacent letters or numerals at the same offset, that’s strong evidence of a doubled die. If the anomaly looks like an isolated gouge or a shallow line that doesn’t mirror other characters, treat it as post-strike damage.
Can I identify a 1943 copper wheat penny from a photo alone?
A photo can suggest a 1943 copper cent—copper has a noticeably different sheen and often a darker, warmer hue than steel—but color alone is not proof. Lighting, camera white balance, and surface toning change appearance dramatically. A quick non-destructive magnet test and a precise weight check are simple physical tests that can confirm whether a coin is copper or steel. If you suspect a 1943 copper piece from a photo, record clear macro images and follow up with magnet/weight tests or an expert inspection before assuming rarity.
What does a repunched mint mark (RPM) look like on a wheat penny?
A repunched mint mark appears as a doubled or offset mint mark confined to the small letter area (for example, the D or S below the date). Unlike a doubled die that affects multiple fields, an RPM often looks like one character printed twice with a slight shift. In photos, RPMs are best evaluated at high magnification: the second impression usually shows partial overlap, and you may see remnants of the earlier punch under the main mint mark. Compare close-up images to published RPM examples for the same year and mint to verify the match.
When should I get an expert opinion or third-party grading for a suspected error?
Seek expert review when the identification affects value, when the error is rare (for example, certain 1943 copper claims or high-grade examples of famous doubled dies), or when physical tests conflict with photo evidence. If an app or your comparison workflow yields a provisional match to a documented variety that could be valuable, stop and verify using hands-on methods—weight, magnetism, and provenance checks—or consult a reputable numismatic grader or experienced specialist. Keep your app results and photo set as documentation to streamline the expert review.