
State Quarter Errors: Common Varieties and Visual Checks
Identify visible state quarter errors with practical photo checks, common lookalikes, and safe follow-up actions before you trust a single image.
Quick answer for state quarter errors
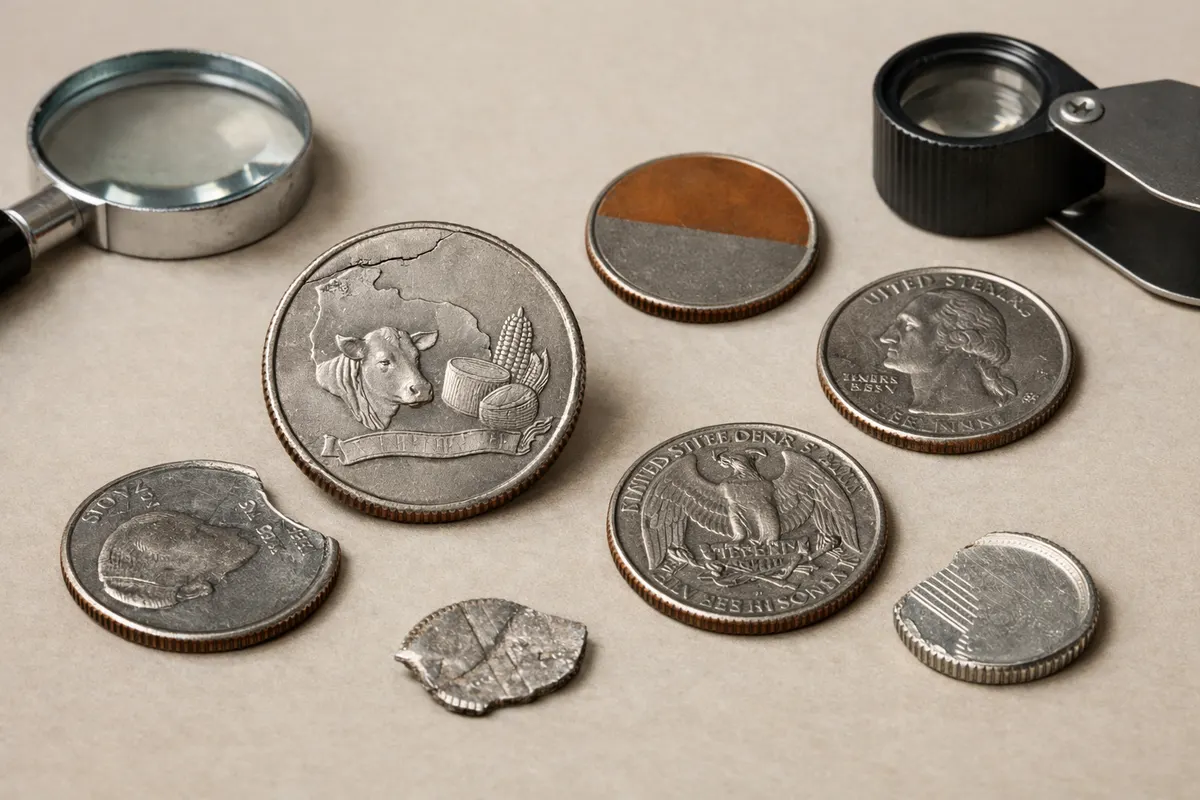
State quarter errors are often visible in phone photos, but not every unusual mark is an “error.” When assessing state quarter errors from images, the most reliable clues are structural: doubled or shifted design elements (like a repunched mint mark or date), portions of the design that are consistently missing or duplicated across an area (off-center strikes, broadstrikes, clipped planchets), and clear die breaks or cuds that produce raised lines not explained by wear.
Photos can suggest likely error categories—off-center strike, doubled die, clipped planchet, repunched mint mark (RPM), die crack, or die clash—if you can show consistent, repeatable features under good lighting and with scale. However, a photo alone cannot prove rarity, market value, or whether a suspected error was altered by post-mint damage, cleaning, or artificial tooling. Treat photographic identification as a diagnostic first pass, not a final appraisal.
If your photo shows one of the strong, structural clues above, document it with a set of consistent images (obverse, reverse, edge, and a scale reference). If clues are marginal or inconsistent, take better photos and compare against known examples. Use an identification tool like Coin Identifier - Coinora after you collect clear images and context; treat its output as a research lead to confirm with physical inspection or a trusted numismatist.
- Strong clues: doubled elements, repunched mint marks, off-center strikes, clipped planchets, die cracks/cuds.
- Weak clues: color/toning, single small scratches, one-angle shadowing—these often mimic errors.
- Photographs can suggest error type but cannot prove value, authenticity, or origin without further checks.
Strongest visual clues for state quarter errors
When evaluating state quarter errors from photos, prioritize clues that reflect how the coin was struck or manufactured. Doubling that is concentric to the design—where letters or numbers appear to have a secondary, offset impression—points to doubled die problems. Doubling that follows die polish lines or appears shallow and inconsistent is more likely a post-strike surface issue and should be treated with suspicion.
Repunched mint marks (RPMs) are another high-confidence clue when visible. An RPM shows one mint mark stamped over another with a clear offset, usually visible as extra strokes around the mint letter. The position of the mint mark relative to the rim and nearby design elements is important. If you can capture both the mint mark and a measured rim distance in photos, the pattern of overlapping impressions becomes strong evidence of an RPM.
Off-center strikes, clipped planchets, and broadstrikes leave unmistakable geometry changes: a missing portion of the design, a flat clipped edge, or extra blank metal on one side. These are structural and survive lighting and angle. Die breaks, cuds, and raised metal rails will appear as consistent raised seams or islands that interrupt normal design flow. They often cast small shadows under oblique light and remain visible when rotated.
Other high-value photographic clues include doubled dates (especially where the second date is clearly offset), multiple repeated lines around stars or lettering (consistent with die doubling), and large clashes where design elements imprint into the opposite die. When you can capture the coin in at least two lighting directions and include a scale, these structural clues rise to the top as reliable initial identifiers.
- Doubled die: clear second impression of letters, numbers, or design elements concentric to the original strike.
- Repunched mint mark (RPM): overlapping mint letters with visible retooling strokes.
- Off-center strike / clipped planchet: missing design area or flat clipped rim visible from obverse/reverse.
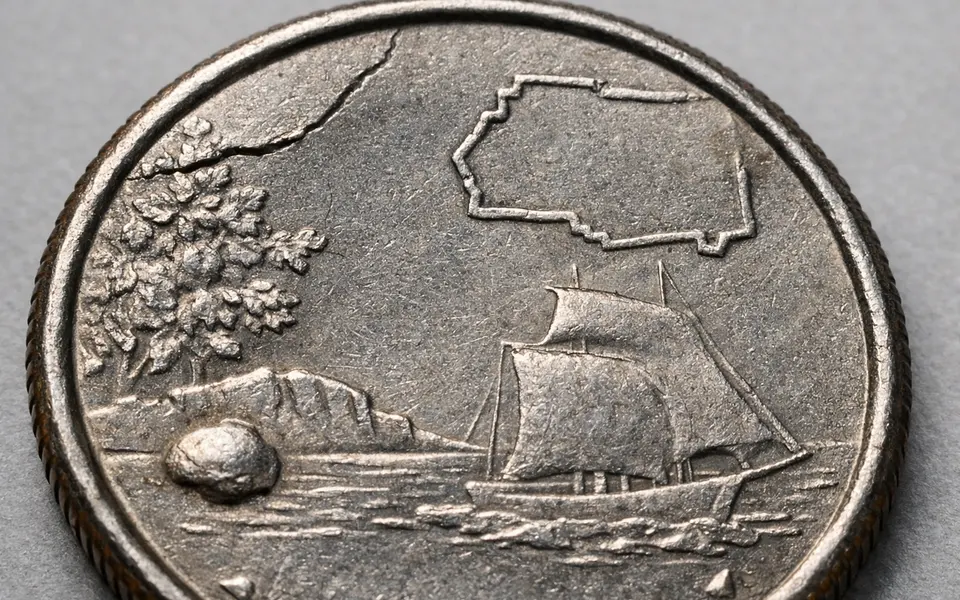
- Die break / cud: raised metal seams or islands that interrupt normal design contours.
- Broadstrike: design pushed out onto the rim or flattened edge without a collar.
- Die clash: faint ghost images of the opposite side when dies collide without a planchet.
Weak signals to ignore with state quarter errors
Not every odd mark is an error. Surface scratches, circulation wear, corrosion, and post-mint environmental damage can mimic error features. Color and toning are especially unreliable: a color change might be toning, a spot of corrosion, residue from glue, or a surface cleaning. Toning patterns may be attractive but don't indicate how the coin was struck.
Glare, shadow, and angle often create the illusion of doubling or raised features. A single low-resolution photo taken at an awkward angle can produce reflections that look like a doubled date or a faint die break. Always verify a suspected error with photos taken at multiple angles and with raking light to see whether the feature casts repeatable shadows.
Small chips or nicks on the rim and surface—often from circulation—are common lookalikes for clipped planchets or rim breaks. Similarly, die polishing lines, machine doubling (strike-through contact from other objects), and die deterioration can create artifacts. These are weak signals unless they appear in repeatable patterns that match known error morphologies.
Finally, avoid relying on weight, thickness, or subtle color shifts in a photo. Those are physical measurements or attributes that require a scale or lab test. A photograph can suggest a difference in planchet type or struck-on-wrong-planchet only when combined with clear edge shots, readable date/mint details, and a way to confirm metal composition separately.
- Color/toning alone: aesthetic, not proof of an error.
- Single-angle reflections: may mimic doubling or raised cracks.
- Small isolated nicks: usually circulation damage, not manufacturing error.
- Machine marks and die polish: often mistaken for die doubling.
- Photo-only weight or thickness claims: impossible to verify reliably from an image.
Step-by-step comparison workflow for state quarter errors
A structured comparison workflow helps you separate true error varieties from lookalikes. Start by organizing your photos: front (obverse), back (reverse), edge, and a close-up of the feature in question. Include a simple scale (ruler or a coin of known diameter) in at least one image. Good documentation is essential—without it, even a strong clue becomes hard to confirm.
Next, document lighting and orientation. Photograph the coin flat with diffuse overhead light and again with raking (angled) light to reveal raised versus incised features. Rotate the coin gradually and re-photograph the suspicious area. If a raised line or double impression casts a consistent shadow at multiple rotations and lighting angles, it is more likely structural than a reflection or scratch.
Compare the suspect coin to verified examples. Look for the same geometry: where an RPM sits relative to the rim, how far an off-center strike cuts into a design, or the exact location and direction of a die crack. Use reference photos from trusted sources and note whether the pattern of metal flow, doubling, or interruption matches. A single similar image is a clue, but multiple matches reinforce the diagnosis.
Cross-check mint records and known varieties. Many state quarter errors are well-documented: some years and mint marks produced specific RPMs, doubled dies, or broadstrikes. After your visual match, consult databases or auction archives for similar examples and provenance. If available, use the Coin Detection guide for broader comparison techniques and lookalike traps to refine your judgment.
- 1) Gather images: obverse, reverse, edge, close-up; include a scale.
- 2) Re-shoot with diffuse and raking light; rotate coin to test shadow consistency.
- 3) Compare geometry, position, and repeatability against verified examples.
- 4) Check mint records and documented varieties for the same year/mint mark.
- 5) Note uncertainties: keep marginal cases as research leads, not certainties.
Using an app after your visible checks
After you’ve gathered consistent photos and done a side-by-side visual comparison, use a coin-identification app as a next step to broaden and speed up your research. Open the app and scan or import the same well-lit images you used for your visual checks. The app can suggest likely error categories and surface-level matches, but treat results as leads to verify, not definitive answers.
When using the app, highlight the exact area you relied on (date, mint mark, rim, or die flaw) and add short notes describing why you think it’s an error (for example, “offset mint mark with visible double strokes” or “obvious clipped planchet at 11 o’clock”). Clear notes help later comparison and make it easier to show the coin to other collectors or experts if you escalate the evaluation.
If the app returns candidate matches, follow the earlier comparison workflow: verify geometry, lighting consistency, and position against verified examples. Use any links or references the app provides to check auction records or documented varieties. Keep a conservative stance: an app can save time and propose matches, but final confirmation often requires physical inspection, measurement, or third-party grading for market-level claims.
For broader context on photo-based checks and lookalike traps, consider reading resources that explain how reflected light, surface contamination, and wear create false positives. One good internal resource that covers these broader visual clues and safe next steps is Coin Detection: Visual Clues, Similar Lookalikes, and Safe Next Steps, which helps when an image alone leaves room for doubt.
- Scan the same high-quality images you used for manual checks.
- Mark the exact suspicious area and add concise notes.
- Treat app matches as leads—verify geometry and repeatability.
- If uncertain, collect physical measurements or seek a trusted numismatist.
Related guides
Next step: scan your images with Coin Identifier - Coinora
After you’ve photographed the obverse, reverse, and edge and tested lighting and rotation, scan those images with Coin Identifier - Coinora as a research-first step. The app can surface likely error categories and matching examples to guide your next checks, but treat results as leads—follow up with physical measurements or a trusted numismatist before making value or authenticity decisions.
Take the next step →Frequently asked questions
Can I identify a state quarter error from a single phone photo?
A single phone photo can indicate a possible error but rarely proves it. One image might show a strong, structural clue—like a clearly clipped planchet or an obvious repunched mint mark—but even those benefit from supporting shots: a reverse, an edge, and images under raking light. Multiple consistent photos reduce the chance of misreading reflections, scratches, or post-mint damage as manufacturing errors.
What common state quarter errors should I look for first?
Start with structural errors that are most photo-friendly: off-center strikes (large areas of missing design), clipped planchets (flat missing rim), repunched mint marks (visible overlapping mint letters), doubled dies (concentric doubled letters or digits), die cracks/cuds (raised seams or islands), and broadstrikes (design spread over rim). These produce repeatable geometry that survives different lighting and angles.
How can I tell the difference between post-mint damage and an error?
Post-mint damage usually appears irregular, localized, and inconsistent with the struck design—nicks, gouges, corrosion spots, or tool marks. Manufacturing errors follow the design’s geometry or appear as repeated anomalies across a pattern (for example, a die crack running across several letters). Use raking light and rotation: structural errors cast consistent shadows and retain the same relationship to the rim and design elements regardless of angle.
If I suspect an error, what are safe next steps before seeking valuation?
Document thoroughly: multiple photos including edge and a scale, note year and mint mark, and record how the coin was stored. Use an app like Coin Identifier - Coinora to generate candidate matches and assemble comparable images from auction records. Do not rely on a single photo for valuation or authenticity claims. If the coin looks rare or valuable, consult a reputable dealer or third-party grader for physical inspection and measurement before accepting any high-value offers.